jenkins에게 sudo 명령 실행권한을 부여하고 실행할때 password 를 물어보지않는 설정을 추가하고 해당파일 보안설정을 해준다
$ jenkins ALL=(ALL) NOPASSWD: ALL
$ chmod 0440 jenkins
근데 나는 이 방법으로는 jenkins 배포할때 권한이 자꾸 튕겨져나가서, 아래 커맨드도 실행했다
$ echo "jenkins ALL = (root) NOPASSWD:ALL" | sudo tee /etc/sudoers.d jenkins
$ sudo chmod 0440 /etc/sudoers.d/jenkins
2. Jenkins - Github 계정 연결
이제 Jenkisn 웹페이지에 접속해보자
Jenkins 에서 github 를 사용하려면 우선 github계정을 jenkins에 등록시켜야 한다
이때 사용할 github계정은 엄밀히 말하면 내가 배포하려고 하는 repository에 접근 가능한 github 계정이기만 하면 된다
대시보드 > Jenkins 관리 > System 으로 이동해보자
Github 이라는 영역이 보일텐데 여기서 git hub 계정추가가 가능하다
gitHub server 콤보박스를 선택하면 아래와 같은 영역이 노출될것이다
고대~~~로 냅두고 Credentials 하단의 Add 를 눌러준다
Credentials 는 Jenkins 에 등록된 github 계정목록이 노출되는 부분이지만
지금은 등록된 github 계정이 없으므로 none으로 보이는것일뿐이다
각 항목의 의미는 아래와 같다
username : gihub 계정 username password : github 계정 password ID : 해당 정보를 대표할 name이며, 해당 계정을 구분하기위한 용도로만 사용되는 대표이름. title Description : 안적어도 됨
username은 github의 username 이고 ID는 jenkins 에서 사용할 id이다 즉, Credentials 목록에 노출될 text이다
이렇게 입력하면 비로소 Credentials 에 내 계정이 보인다
3. Jenkins - SSH 설정
앞으로 Jenkins 에서 AWS 서버에 접속하여 배포를 진행하겠지만, 우리는 해당서버에 pem/ppk 파일로 접속하고있기때문에 Jenkins에도 해당정보를 전달해주어야한다
1) SSH 플러그인 설치
기본적으로 Jenkins 에는 SSH 플러그인이 없기때문에 따로 설치해줘야 한다
아래 경로로 이동한다
Jenkins 관리 > 플러그인관리 > 설치가능 > Publish Over SSH 설치
설치완료되고 재시작 여부를 물으면 재시작해준다
재시작이 완료되면 System 관리 > Publish Over SSH 영역이 생겨있는것을 볼 수 있다
key 영역을 입력해줘야하는데, 다운받아놓은 pem 파일을 크롬에 던지면 텍스트가 주루룩 나온다
그것을 입력해주자
하지만 이것은 pem 파일만 등록된거고, 그래서 어느 서버에 적용할건지 설정해줘야한다.
하단의 추가 버튼을 클릭하여 SSH Server 를 등록하자
name : 해당 서버를 지칭할 이름. 중요하지않다 title 개념 hostname : AWS IP주소 username : 유저명 (우리의 경우는 ubuntu라고 적는다) remote directory : 젠킨스로 생성된 배포파일의 root 경로
여기서 어려운 부분은 remote directory 인데, 우선 AWS 서버 내 배포파일이 저장될 위치를 알아서 정해보자.
나는 home 디렉토리에 ubuntu 폴더를 만들었다.
그래서 위와같이 Remote Directory 는 /home/ubuntu 가 되었다
이렇게 하면 Jenkins가 실제로 배포할때 서버에 접속할 수 있게 되었다
3. 배포 item 생성 - Free Style
자 드디어 배포를 해보자!!
Dashboard 에서 새로운 Item 을 추가해준다
다양한 선택지가 있지만, 우선 Freestyle project 를 만들어보겠다
해당 프로젝트명 혹은 구분가능한 이름을 input에 입력해주자
두가지 옵션의 간단한 차이는 아래와 같다
Freestyle project ? -> jenkins 설정으로만 배포한다
Pipeline ? -> 프로젝트 소스코드에 내가 직접 커맨드를 입력한 정보를 기반으로 배포한다
item 을 생성하면 또!! 설정창이 나온다 ㅎㅎ
기존에 설정했던것이 서버에 대한 설정이라면, 지금은 repository 에 대한 설정이라고 보면된다
1) Github 설정
설명 부분에 해당 프로젝트의 설명을 간단히 입력해주고 하단의 Github project 체크박스를 선택한다
그리고 나의 repository 주소를 넣어준다. git clone 할때 입력되는 http 주소이다
밑에 내리면 소스코드관리 -> Git 을 선택한다
Repository URL 은 위에서 입력한 github 주소와 똑같이 입력해주고, Credentials도 기존에 설정된 계정을 선택한다
하지만!!!
만약 private github repository 를 사용한다면 해당 계정으로는 오류가 발생한다
원인은, 정책변경으로 인하여 user/password 방식으로 등록한 github계정으로는 해당 repository에 접근이 불가하다
토큰방식으로 등록된 github 계정이 필요하다
또한!! 해당 private repository를 생성한 계정이 필요하다.
repository 가 public 이라면 아래 과정은 넘어가주길 바란다.
만약 private 라면 Credentials 하단의 Add를 눌러서 토큰방식의 계정을 추가해보자
secret 에 github에서 발급받은 토큰을 입력해야한다
Kind → Secret Text 선택 (토큰 인증방식) Domain : Global credentials Secret : 깃헙에서 발급 받은 토큰 입력 ID : 해당 정보를 대표할 name이며, 해당 계정을 구분하기위한 용도로만 사용되는 대표이름. title Description : 안적어도 됨
2) Build Step 설정
github 설정하고 내리다보면 빌드유발..빌드환경..등등 많이 있지만
안타깝게도 AWS 프리티어는 빌드를 할때마다 data transfer fee가 청구된다 ㅠㅠ 그래서 한달에 정해진 용량이있는데..
내가봣을땐 한달에 30번정도 하면 용량에 딱 맞았던거같다. 그래서 github hook을 연결해서 빌드하는 작업은 건너뛰었다
이제 각 프로젝트에 맞는 빌드과정을 진행하면 되는데, 나는 Spring boot - java 프로젝트를 배포하였다
추후 해당 jenkins 에 접근하려면 http://ip주소~~/포트번호 이렇게 접근을 해야하기때문에, jenkins 용도로 사용할 포트번호를 정하고 AWS에서 접근권한을 줘야하기 때문이다
AWS 웹페이지 -> 콘솔 -> EC2 -> 보안그룹 -> 인스턴스명 선택 -> 인바운드 규칙 편집
나는 8081 이라는 포트를 사용하였다.
본인이 원하는 포트번호를 정하고 나중에 포트번호를 까먹을 수 있기 때문에 메모란에 jenkins 라고 적어주자.
4. Jenkins 설치
AWS에서 제공해주는 Jenkins 설치기능을 사용하여도 되지만... 유료다!
나는 철저한 무과금을 위하여 직접 jenkins를 설치하였다
설치하는 과정에서 jenkins 의 ssh key 변경 등의 이슈가 있었고, 아래 과정이 나중에는 안먹힐수도있지만 현재까지는 잘 작동되는것을 확인하였다
1) 서버접속
윈도우/맥 OS 에서 기존에 만들어둔 서버에 접속한다
2) Jenkins 설치
아래 커맨드를 순서대로 실행한다
$ wget -q -O - https://pkg.jenkins.io/debian/jenkins-ci.org.key | sudo apt-key add -
$ echo deb http://pkg.jenkins.io/debian-stable binary/ | sudo tee /etc/apt/sources.list.d/jenkins.list
그리고 아래 커맨드로 젠킨스를 실제로 다운로드 받는데
$ sudo apt install jenkins
오류가 발생했다
ubuntu@ip-172......:~$ sudo apt-get install jenkins Reading package lists... Done Building dependency tree... Done Reading state information... Done Package jenkins is not available, but is referred to by another package. This may mean that the package is missing, has been obsoleted, or is only available from another source
E: Package 'jenkins' has no installation candidate
$ echo deb [signed-by=/usr/share/keyrings/jenkins-keyring.asc] \
    https://pkg.jenkins.io/debian-stable binary/ | sudo tee \
    /etc/apt/sources.list.d/jenkins.list > /dev/null
무슨 key가 변경된거같은데 이렇게 입력해도 아무 반응이 없을것이다
긴가민가하지만, 다시 install을 시작해보자
$ sudo apt update
$ sudo apt install jenkins
잘 될것임!! 안되면 구글링 각 ㅠㅠ
설치 중 아래와 같은 문구가 나온다면 N 을 해주자
Configuration file '/etc/gnome/defaults.list' ==> Modified (by you or by a script) since installation. ==> Package distributor has shipped an updated version. What would you like to do about it ? Your options are: Y or I : install the package maintainer's version N or O : keep your currently-installed version D : show the differences between the versions Z : start a shell to examine the situation The default action is to keep your current version. *** defaults.list (Y/I/N/O/D/Z) [default=N] ?
설치가 잘 됐는지 확인하기위해 아래 커맨드로 jenkins 상태를 확인한다
$ sudo systemctl start jenkins
$ sudo systemctl status jenkins
하지만 상태를 보면 마지막에 httpPort = 8080으로 되어있을것이다
이것을 AWS에서 보안규칙변경한 8081로 바꿔보자
3) jenkins 포트변경
jenkins 포트변경 하려면 jenkins.service 파일을 수정해야하는데 해당 파일은 readOnly라서 수정 권한이 필요하다
권한 부여 후 수정해보자
chmod 777 ? 모든 사용자에게 읽기, 쓰기, 실행 권한을 부여
$ sudo chmod 777 /usr/lib/systemd/system/jenkins.service
$ sudo vim /usr/lib/systemd/system/jenkins.service
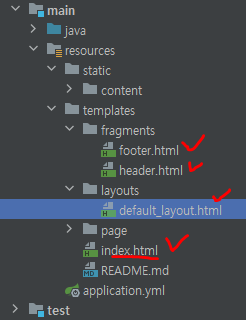
나는 react + next.js 프로젝트를 jenkins로 배포할 예정이며 next.js와 jenkins pipeline 에서 프록시설정을 진행할것이기때문에 nginx에 별도의 proxy 설정은 하지않았다
하지만 만약 proxy 설정이 필요하다면 아래 번외를 참고!
아래는 참고용 Nginx 커맨드
$ sudo service nginx status # nginx 상태 확인
$ sudo service nginx start # nginx 실행
$ sudo service nginx restart # 중지 후 재실행
$ sudo servcie nginx reload # 수정된 파일 적용하여 연결을 끊지 않고 재실행
$ sudo service nginx stop # nginx 중지
기본적으로 Nginx는 서버가 부팅될 때 자동으로 시작된다
$ sudo service disable nginx # 자동 시작 비활성화
$ sudo service enable nginx # 자동 시작 활성화
번외
만약 nginx 에 proxy 설정을 해야한다면 아래 커맨드로 nginx 설정파일 진입
$ sudo vi /etc/nginx/sites-avaliable/default
위 이미지와 같이 location 과 root 를 설정해주고 저장
root : nginx로실행되는프로젝트위치 location : ip 혹은도메인명/~ 쳤을때연결되어야하는 proxy 즉포트연결설정
- nuxt프로젝트 localhost:3000 뜨면 localhost:3000/api/helloWorld 주소창에 적고 엔터!
- 프론트 화면에 백단에서 보낸 Hello World 글자 보이는지 확인
5. jpa 연결
1) 데이터 바인딩
데이터 바인딩 되어야될 페이지에 mounted로 걸어준다
<template>
...
 	<tr v-for="(row, idx) in list" :key="idx">
          <td>{{ row.idx }}</td>
          <td><a v-on:click="fnView(`${row.idx}`)">{{ row.title }}</a></td>
          <td>{{ row.author }}</td>
          <td>{{ row.created_at }}</td>
	</tr>
</template>

<script>
export default {
    data() { //변수생성
        return {
            requestBody: {}, //리스트 페이지 데이터전송
            list: {}, //리스트 데이터
        }
    },
    mounted() {
        this.getBoardList()
    },
    methods: {
        getBoardList() {
            this.requestBody = { // 데이터 전송
                keyword: this.keyword,
                page: this.page,
                size: this.size
            }

            this.$axios.get(this.$serverUrl + "/board/list", {
                params: this.requestBody,
                headers: {}
            }).then((res) => {
                this.list = res.data  //서버에서 데이터를 목록으로 보내므로 바로 할당하여 사용할 수 있다.
            }).catch((err) => {
                alert(err.message);
            })
        }
    }
}
</script>
2) back 서비스 만듦
@Override
    public List<BoardDto> getBoardList() {
        List<BoardDto> result = new ArrayList<>();
        List<Board> boardEntities = boardRepository.findAll();

        for (Board entity : boardEntities) {
            BoardDto dto = BoardDto.builder()
                    .idx(entity.getIdx())
                    .author(entity.getAuthor())
                    .title(entity.getTitle())
                    .contents(entity.getContents())
                    .createdAt(entity.getCreatedAt().format(DateTimeFormatter.ofPattern("yyyy-MM-dd hh:mm:ss")))
                    .build();

            result.add(dto);
        }

        return result;
    }
3) back api 만듦
@RestController
@RequiredArgsConstructor
public class BoardController {

    private final BoardService boardService;

    @ResponseBody
    @GetMapping("/board/list")
    public List<BoardDto> boardList() {
        return boardService.getBoardList();
    }
 }
4) 데이터 연결 확인
nuxt / vue 다른점
vue : 만약 vue 였다면 이 상황에서 게시글 상세페이지를 보고싶을때, 새로운 vue 페이지만들고 라우터를 추가해야함
nuxt : 라우터추가안해도됨, pages에 넣어두면 url을 통한 이동은 바로 이동됨
ex)
이런식으로 pages에 index2.vue라는 파일을 생성하고 링크로 이동하면 해당페이지에 바로 접속된다.
public Round getDetail(String code) {

    //builder 를 따로 뺀 이유는, 이후에 where 조건이 추가될수도 있기 때문입니다.
    BooleanBuilder builder = new BooleanBuilder();
    builder.and(round.code.eq(code));

    }
querydsl 생성에 앞서 먼저 builder 를 만들어준다.
where 조건에 들어갈 부분을 넣으면 된다.
public Round getDetail(String code) {

    //builder 를 따로 뺀 이유는, 이후에 where 조건이 추가될수도 있기 때문입니다.
    BooleanBuilder builder = new BooleanBuilder();
    builder.and(round.code.eq(code));

    return jpaQueryFactory
            .select(round)
            .from(round)
            .innerJoin(round.list,roundOrder) //oneToMany
            .fetchJoin()
            .where(builder)
            .orderBy(roundOrder.round.desc())
            .fetchOne();
    }
이게 완성된 로직인데, innerjoin에 들어가는 파라미터는, 부모@Entity에 @OneToMany로 걸려있는 변수를, 뒤에는 조인할 q클래스명을 입력해줬다.
이렇게 돌리면
select regularrou0_.ID                         as id1_47_0_,
       userregula1_.ID                         as id1_60_1_,
       regularrou0_.CREATED                    as created2_47_0_,
       regularrou0_.CREATED_BY                 as created_3_47_0_,
       regularrou0_.UPDATED                    as updated4_47_0_,
       regularrou0_.UPDATED_BY                 as updated_5_47_0_,
       regularrou0_.BUYER_EMAIL                as buyer_em6_47_0_,
       regularrou0_.BUYER_MOBILE               as buyer_mo7_47_0_,
       regularrou0_.BUYER_NAME                 as buyer_na8_47_0_,
       regularrou0_.CARD_NAME                  as card_nam9_47_0_,
       regularrou0_.INDEX_ROUND                as index_r10_47_0_,
       regularrou0_.ITEM_NAME                  as item_na11_47_0_,
       regularrou0_.ITEM_USER_CODE             as item_us12_47_0_,
       regularrou0_.RECEIVE_NAME               as receive13_47_0_,
       regularrou0_.REGULAR_ROUND_END_DATE     as regular14_47_0_,
       regularrou0_.REGULAR_ROUND_START_DATE   as regular15_47_0_,
       regularrou0_.STATUS                     as status16_47_0_,
       regularrou0_.TOTAL_ROUND                as total_r17_47_0_,
       regularrou0_.USER_ID                    as user_id18_47_0_,
       regularrou0_.USER_REGULAR_CARD_ID       as user_re19_47_0_,
       regularrou0_.USER_REGULAR_ROUND_CODE    as user_re20_47_0_,
       userregula1_.CREATED                    as created2_60_1_,
       userregula1_.CREATED_BY                 as created_3_60_1_,
       userregula1_.UPDATED                    as updated4_60_1_,
       userregula1_.UPDATED_BY                 as updated_5_60_1_,
       userregula1_.DISCOUNT_RATE              as discount6_60_1_,
       userregula1_.FAIL_COUNT                 as fail_cou7_60_1_,
       userregula1_.ITEM_ID                    as item_id8_60_1_,
       userregula1_.ITEM_NAME                  as item_nam9_60_1_,
       userregula1_.ITEM_SEQUENCE              as item_se10_60_1_,
       userregula1_.ORDER_CODE                 as order_c11_60_1_,
       userregula1_.ORDER_DATE                 as order_d12_60_1_,
       userregula1_.ORDER_SEQUENCE             as order_s13_60_1_,
       userregula1_.ORDER_STATUS               as order_s14_60_1_,
       userregula1_.PAY_AMOUNT                 as pay_amo15_60_1_,
       userregula1_.PAY_DATE                   as pay_dat16_60_1_,
       userregula1_.PAYMENT_INTERVAL           as payment17_60_1_,
       userregula1_.QUANTITY                   as quantit18_60_1_,
       userregula1_.ROUND                      as round19_60_1_,
       userregula1_.SHIPPING_CANCEL_END_DATE   as shippin20_60_1_,
       userregula1_.SHIPPING_CANCEL_START_DATE as shippin21_60_1_,
       userregula1_.SHIPPING_READY_END_DATE    as shippin22_60_1_,
       userregula1_.SHIPPING_READY_START_DATE  as shippin23_60_1_,
       userregula1_.USE_FLAG                   as use_fla24_60_1_,
       userregula1_.USER_DELIVERY_ID           as user_de25_60_1_,
       userregula1_.USER_ID                    as user_id26_60_1_,
       userregula1_.USER_REGULAR_CARD_ID       as user_re27_60_1_,
       userregula1_.USER_REGULAR_ROUND_CODE    as user_re28_60_1_,
       userregula1_.USER_REGULAR_ROUND_CODE    as user_re28_60_0__,
       userregula1_.ID                         as id1_60_0__
from OP_ROUND regularrou0_
         inner join OP_ROUND_ORDER userregula1_
                    on regularrou0_.CODE = userregula1_.code
where regularrou0_.CODE = '1111'
order by userregula1_.ROUND desc
이런식으로 내가원하던 조인문이 나온다.
이때 fetchJoin을 안쓰면
select regularrou0_.ID                       as id1_47_,
       regularrou0_.CREATED                  as created2_47_,
       regularrou0_.CREATED_BY               as created_3_47_,
       regularrou0_.UPDATED                  as updated4_47_,
       regularrou0_.UPDATED_BY               as updated_5_47_,
       regularrou0_.BUYER_EMAIL              as buyer_em6_47_,
       regularrou0_.BUYER_MOBILE             as buyer_mo7_47_,
       regularrou0_.BUYER_NAME               as buyer_na8_47_,
       regularrou0_.CARD_NAME                as card_nam9_47_,
       regularrou0_.INDEX_ROUND              as index_r10_47_,
       regularrou0_.ITEM_NAME                as item_na11_47_,
       regularrou0_.ITEM_USER_CODE           as item_us12_47_,
       regularrou0_.RECEIVE_NAME             as receive13_47_,
       regularrou0_.REGULAR_ROUND_END_DATE   as regular14_47_,
       regularrou0_.REGULAR_ROUND_START_DATE as regular15_47_,
       regularrou0_.STATUS                   as status16_47_,
       regularrou0_.TOTAL_ROUND              as total_r17_47_,
       regularrou0_.USER_ID                  as user_id18_47_,
       regularrou0_.USER_REGULAR_CARD_ID     as user_re19_47_,
       regularrou0_.USER_REGULAR_ROUND_CODE  as user_re20_47_
from OP_ROUND regularrou0_
         inner join OP_ROUND_ORDER userregula1_
                    on (regularrou0_.CODE = userregula1_.CODE)
where regularrou0_.CODE = '1111'
order by userregula1_.ROUND desc;

select userregula0_.USER_REGULAR_ROUND_CODE    as user_re28_60_0_,
       userregula0_.ID                         as id1_60_0_,
       userregula0_.ID                         as id1_60_1_,
       userregula0_.CREATED                    as created2_60_1_,
       userregula0_.CREATED_BY                 as created_3_60_1_,
       userregula0_.UPDATED                    as updated4_60_1_,
       userregula0_.UPDATED_BY                 as updated_5_60_1_,
       userregula0_.DISCOUNT_RATE              as discount6_60_1_,
       userregula0_.FAIL_COUNT                 as fail_cou7_60_1_,
       userregula0_.ITEM_ID                    as item_id8_60_1_,
       userregula0_.ITEM_NAME                  as item_nam9_60_1_,
       userregula0_.ITEM_SEQUENCE              as item_se10_60_1_,
       userregula0_.ORDER_CODE                 as order_c11_60_1_,
       userregula0_.ORDER_DATE                 as order_d12_60_1_,
       userregula0_.ORDER_SEQUENCE             as order_s13_60_1_,
       userregula0_.ORDER_STATUS               as order_s14_60_1_,
       userregula0_.PAY_AMOUNT                 as pay_amo15_60_1_,
       userregula0_.PAY_DATE                   as pay_dat16_60_1_,
       userregula0_.PAYMENT_INTERVAL           as payment17_60_1_,
       userregula0_.QUANTITY                   as quantit18_60_1_,
       userregula0_.ROUND                      as round19_60_1_,
       userregula0_.SHIPPING_CANCEL_END_DATE   as shippin20_60_1_,
       userregula0_.SHIPPING_CANCEL_START_DATE as shippin21_60_1_,
       userregula0_.SHIPPING_READY_END_DATE    as shippin22_60_1_,
       userregula0_.SHIPPING_READY_START_DATE  as shippin23_60_1_,
       userregula0_.USE_FLAG                   as use_fla24_60_1_,
       userregula0_.USER_DELIVERY_ID           as user_de25_60_1_,
       userregula0_.USER_ID                    as user_id26_60_1_,
       userregula0_.USER_REGULAR_CARD_ID       as user_re27_60_1_,
       userregula0_.USER_REGULAR_ROUND_CODE    as user_re28_60_1_
from OP_ROUND_ORDER userregula0_
where userregula0_.CODE = 'R20230216100309';
이런식으로 두번나온다.
하지만 fetchJoin이 만사형통은 아니다.. 페이징은 쓸수없기에....
참고로 해당 sql문은 콘솔에서 확인할수있는데
이런식으로 쓱- 보고 지나가기 쉽다. 하지만 꼭 작업할때 긁어서 실제로 sql문을 육안으로 확인해보는 습관을 길러야한다.
2. querydsl 결과를 특정 DTO에 리턴, 서브쿼리받는법
내가 받고싶은 sql문
select RR.USER_ID,
       RR.USER_REGULAR_ROUND_CODE,
       RR.ITEM_NAME,
       RR.REGULAR_ROUND_START_DATE,
       RR.TOTAL_ROUND,
       RR.BUYER_NAME,
       RR.CREATED,
       min(OURR.PAY_DATE),
       min(OURR.PAYMENT_INTERVAL),
       OURR.SHIPPING_READY_START_DATE
from OP_ROUND RR
inner join OP_ROUND_ORDER OURR
        on RR.CODE = OURR.CODE
where OURR.ORDER_CODE is null
  and RR.CODE = (select CODE
                  from OP_ROUND_ORDER
                  where ORDER_CODE = '2222')
특정 결과만 dto에 리턴받고싶을때
@Override
    public dtoA method2(String orderCode){

		//서브쿼리에 넣을 where 절
        BooleanBuilder subBuilder = new BooleanBuilder();
        subBuilder.and(roundOrder.orderCode.eq(orderCode));

		//메인쿼리에 넣을 where 절
        BooleanBuilder builder = new BooleanBuilder();
        builder.and(roundOrder.orderCode.isNull());
        builder.and(round.code.eq(
                JPAExpressions.select(roundOrder.code)
                        .from(roundOrder)
                        .where(subBuilder)
        ));

        return jpaQueryFactory
                .select(Projections.constructor(dtoA.class,
                        round.userId,
                        round.userRegularRoundCode,
                        round.itemName,
                        round.regularRoundStartDate,
                        round.totalRound,
                        round.buyerName,
                        round.created,
                        roundOrder.payDate.min(),
                        roundOrder.paymentInterval.min())) //그룹함수는 여기서
                .from(round)
                .join(round.list,roundOrder)
                .where(builder)
                .fetchOne();
    }
서브쿼리는 JPAExpressions 를 사용해서 조인시킨다.
역시 이때도 where 조건이 많아지면 너무 산만하기때문에 상단에 따로 선언하고 사용하였다.
Projections.contructor 사용하면 dto로 받을수있다.
첫 파라미터에 리턴받고싶은 dto 클래스를 추가하고 뒤에는 전부 내가받고싶은 컬럼명 나열한다.